
There’s nothing quite like the comforting scent of buttery garlic wafting through the kitchen, especially when it signals the arrival of my irresistible Buttery Garlic Cheese Bombs. After a long week, I found myself searching for a quick, satisfying snack that would delight my taste buds without requiring hours in the kitchen. These cheesy bites are the perfect answer—easy enough to whip up in no time and crowd-pleasing at any gathering, from casual game nights to fancy dinner parties.
Picture this: crisp exteriors that give way to a warm, oozy center, rich with gooey cheese and just the right hint of garlic. With a base of refrigerated biscuit dough, you can easily customize them with your favorite cheeses or spices, making them a versatile option for any palate. Whether you’re a culinary novice or a seasoned chef, these buttery delights promise to elevate your appetizer game effortlessly. So, grab your air fryer and let’s dive into this cheesy goodness together!

Why are Buttery Garlic Cheese Bombs irresistible?
Easy to Prepare: You’ll love how straightforward this recipe is, perfect for busy weeknights or spontaneous gatherings.
Gooey Goodness: Each bite reveals a rich, oozy center that’s pure cheesy bliss, made even better with a hint of fragrant garlic.
Versatile Flavor: Feel free to customize them with mozzarella, cheddar, or even a spicy pepper jack for a unique twist!
Crowd-Pleaser: These delectable bites are sure to be the star of your next gathering, leaving everyone asking for seconds.
Buttery Garlic Cheese Bombs Ingredients
• Get ready to discover irresistible flavors!
For the Dough
- Refrigerated Biscuit Dough – This serves as the perfect buttery base; feel free to swap it for homemade dough for extra freshness.
For the Cheese Filling
- Mozzarella or Cheddar Cheese – Choose your favorite for a creamy texture; try pepper jack if you’re in the mood for a little heat!
For the Flavor
- Unsalted Butter – Adds richness and aids browning; use salted butter if that’s all you have, but reduce extra salt in the recipe.
- Garlic (minced or garlic powder) – Imparts a delightful savory note; roasted garlic will offer a sweeter, more mellow flavor.
- Fresh Parsley (optional) – Provides a lovely pop of color and freshness; omit if you’re short on time or ingredients.
Now you have everything to create those heavenly buttery garlic cheese bombs that are sure to impress!
How to Make Buttery Garlic Cheese Bombs
-
Preheat your air fryer to 350°F (175°C). This will ensure your buttery garlic cheese bombs cook evenly and develop that golden-brown exterior you desire.
-
Cut the cheese into small cubes. Make sure they’re bite-sized so each cheesy bomb has a gooey center that melts perfectly.
-
Separate the pieces of biscuit dough. Gently pull apart the dough, taking care not to tear it as you create the base for your heavenly bites.
-
Wrap each cheese cube with a piece of dough, sealing it tightly. Ensure there are no openings; this is crucial to keep the cheese from leaking out while cooking.
-
Dip each ball into melted butter, giving them a rich flavor and helping achieve that lovely golden color. Then, gently place them in the air fryer basket.
-
Sprinkle minced garlic (or garlic powder) over the tops of the cheese bombs. This adds that delicious aroma and flavor that will have everyone craving more.
-
Cook for about 8-10 minutes or until they turn golden brown and puffed. Keep an eye on them for that perfect texture!
-
Garnish with chopped parsley before serving. This little touch not only enhances the flavor but also adds a beautiful pop of color.
Optional: Serve warm with marinara sauce for dipping.
Exact quantities are listed in the recipe card below.

Expert Tips for Buttery Garlic Cheese Bombs
-
Seal Tightly: Ensure the biscuit dough is firmly wrapped around the cheese to avoid any leaks during cooking.
-
Don’t Overcrowd: Place a few cheese bombs in the air fryer at a time for even cooking; overcrowding leads to uneven results.
-
Watch the Time: Adjust cooking time based on your air fryer model; start with 8 minutes and check for that perfect golden brown.
-
Customize Wisely: Experiment with different cheeses and spices, but remember to keep the ratios balanced to achieve the right meltiness.
-
Serve Fresh: These buttery garlic cheese bombs are best enjoyed warm, but if you have leftovers, store them in the refrigerator and reheat them in the air fryer for best results.
What to Serve with Buttery Garlic Cheese Bombs?
Pair these delightful bites with complementary sides that enhance their flavor and texture, creating a well-rounded meal.
-
Marinara Sauce: A classic dipping companion that adds tangy zest to each cheesy bomb, amplifying the garlic-infused goodness.
-
Crispy Salad: A light, refreshing mix of greens and crunchy vegetables provides a contrast to the rich, buttery cheese, balancing the meal.
-
Garlic Breadsticks: Elevate the garlic experience with warm, buttery breadsticks that complement the flavors perfectly, ideal for dipping!
-
Roasted Vegetables: The subtle sweetness and smoky notes from roasted vegetables contrast beautifully with the cheesy richness of the bombs.
-
Creamy Ranch Dip: This cool, creamy dip is a delightful contrast to the heat of the cheesy bombs, adding a fun twist for your taste buds.
-
Sparkling Lemonade: A refreshing drink that cuts through the richness, balancing the palate and enhancing your snacking experience.
Whether it’s a game day gathering or a cozy family night, these pairings will create a warming and joyful atmosphere around the table!
How to Store and Freeze Buttery Garlic Cheese Bombs
Fridge: Store leftovers in an airtight container for up to 2 days to maintain freshness. Reheat in the air fryer to restore the crispy exterior.
Freezer: For longer storage, freeze uncooked cheesy bombs for up to 3 months. Place them in a single layer on a baking sheet until firm, then transfer to a zip-top bag.
Reheating: Cook from frozen in the air fryer at 350°F (175°C) for about 10-12 minutes until heated through and golden brown. Enjoy the gooey cheese goodness!
Room Temperature: It’s best to avoid leaving these buttery garlic cheese bombs out for more than 2 hours, as they taste best warm and fresh.
Buttery Garlic Cheese Bombs Variations
Feel free to get creative with these mouthwatering snacks; the possibilities are as delicious as they are endless!
-
Dairy-Free: Swap traditional cheese for vegan cheese to suit your dietary needs while keeping that gooey goodness.
-
Spicy Kick: Replace mozzarella with pepper jack cheese for a fiery twist that’ll awaken your taste buds. Pair it with a zesty dipping sauce for an extra layer of flavor.
-
Herb Lovers: Mix in fresh herbs like thyme or rosemary into the dough for an aromatic enhancement that complements the rich cheese perfectly.
-
Savory Additions: Add diced cooked bacon or sautéed mushrooms inside for a heartier filling. These additions will bring a delightful umami flavor, making your bites extra special.
-
Garlic Powder Boost: Instead of minced garlic, use garlic powder mixed with Italian seasoning for a savory flavor explosion. The result is an aromatic snack that smells as good as it tastes!
-
Cheese Medley: Combine mozzarella with gouda or blue cheese for a creamy and tangy mixture that’s sure to impress cheese enthusiasts. The depth of flavors will have everyone asking for your secret!
-
Vegetable Mix-In: For a healthy twist, toss in finely chopped spinach or roasted peppers before sealing up your cheesy bombs. These veggies will add a burst of color and a nutritious boost!
-
Sweet Surprise: Try adding a bit of sweetened cream cheese or a dollop of jam for an intriguing dessert-like option. It’s an unexpected flavor combo that might just become your new favorite!
Make Ahead Options
These Buttery Garlic Cheese Bombs are perfect for meal prep, allowing you to enjoy their delightful taste whenever cravings strike! You can prepare the cheese-filled dough balls up to 24 hours in advance. Simply wrap each cheese cube in the biscuit dough, seal tightly, and place them in an airtight container. Refrigerate them until you’re ready to cook. When it’s time to serve, just preheat your air fryer and proceed to dip them in melted butter and sprinkle garlic before cooking for about 8-10 minutes. This way, you’ll still achieve that golden-brown exterior and gooey center that makes these snacks irresistible—perfect for busy weeknights or impromptu gatherings!

Buttery Garlic Cheese Bombs Recipe FAQs
What should I look for when selecting refrigerated biscuit dough?
Opt for dough that has a fresh expiration date and no visible dark spots. If possible, choose a brand that feels soft and pliable, indicating good quality. If you’re feeling adventurous, you can even make homemade dough for a fresher taste!
How should I store leftover Buttery Garlic Cheese Bombs?
You can keep leftovers in an airtight container in the refrigerator for up to 2 days. To keep the crispy texture intact, I recommend reheating them in the air fryer until they’re warm and golden brown again.
Can I freeze Buttery Garlic Cheese Bombs?
Absolutely! You can freeze uncooked cheese bombs for up to 3 months. Just lay them out in a single layer on a baking sheet until firm, then transfer to a zip-top bag. This way, you’ll have an easy snack ready whenever you crave some cheesy goodness!
What if my cheese begins to leak while cooking?
To prevent this, ensure the biscuit dough is tightly sealed around the cheese. Also, make sure you don’t overcrowd the air fryer basket, as this can cause uneven cooking. If you do see leaks, they could be due to under-sealed dough or the cheese being too warm before wrapping.
Are there any dietary considerations with this recipe?
These cheesy bites are rich and indulgent, so they may not be suitable for those with lactose intolerance or certain dietary restrictions. For gluten-free options, look for gluten-free refrigerated biscuit dough, and feel free to choose dairy-free cheese substitutes to accommodate other dietary needs.
How do I know when my Buttery Garlic Cheese Bombs are done?
You’ll want them to be golden brown and puffed up, which generally takes about 8-10 minutes in an air fryer set at 350°F (175°C). Check them around the 8-minute mark, and don’t hesitate to give them an extra minute or two for that perfect golden hue!
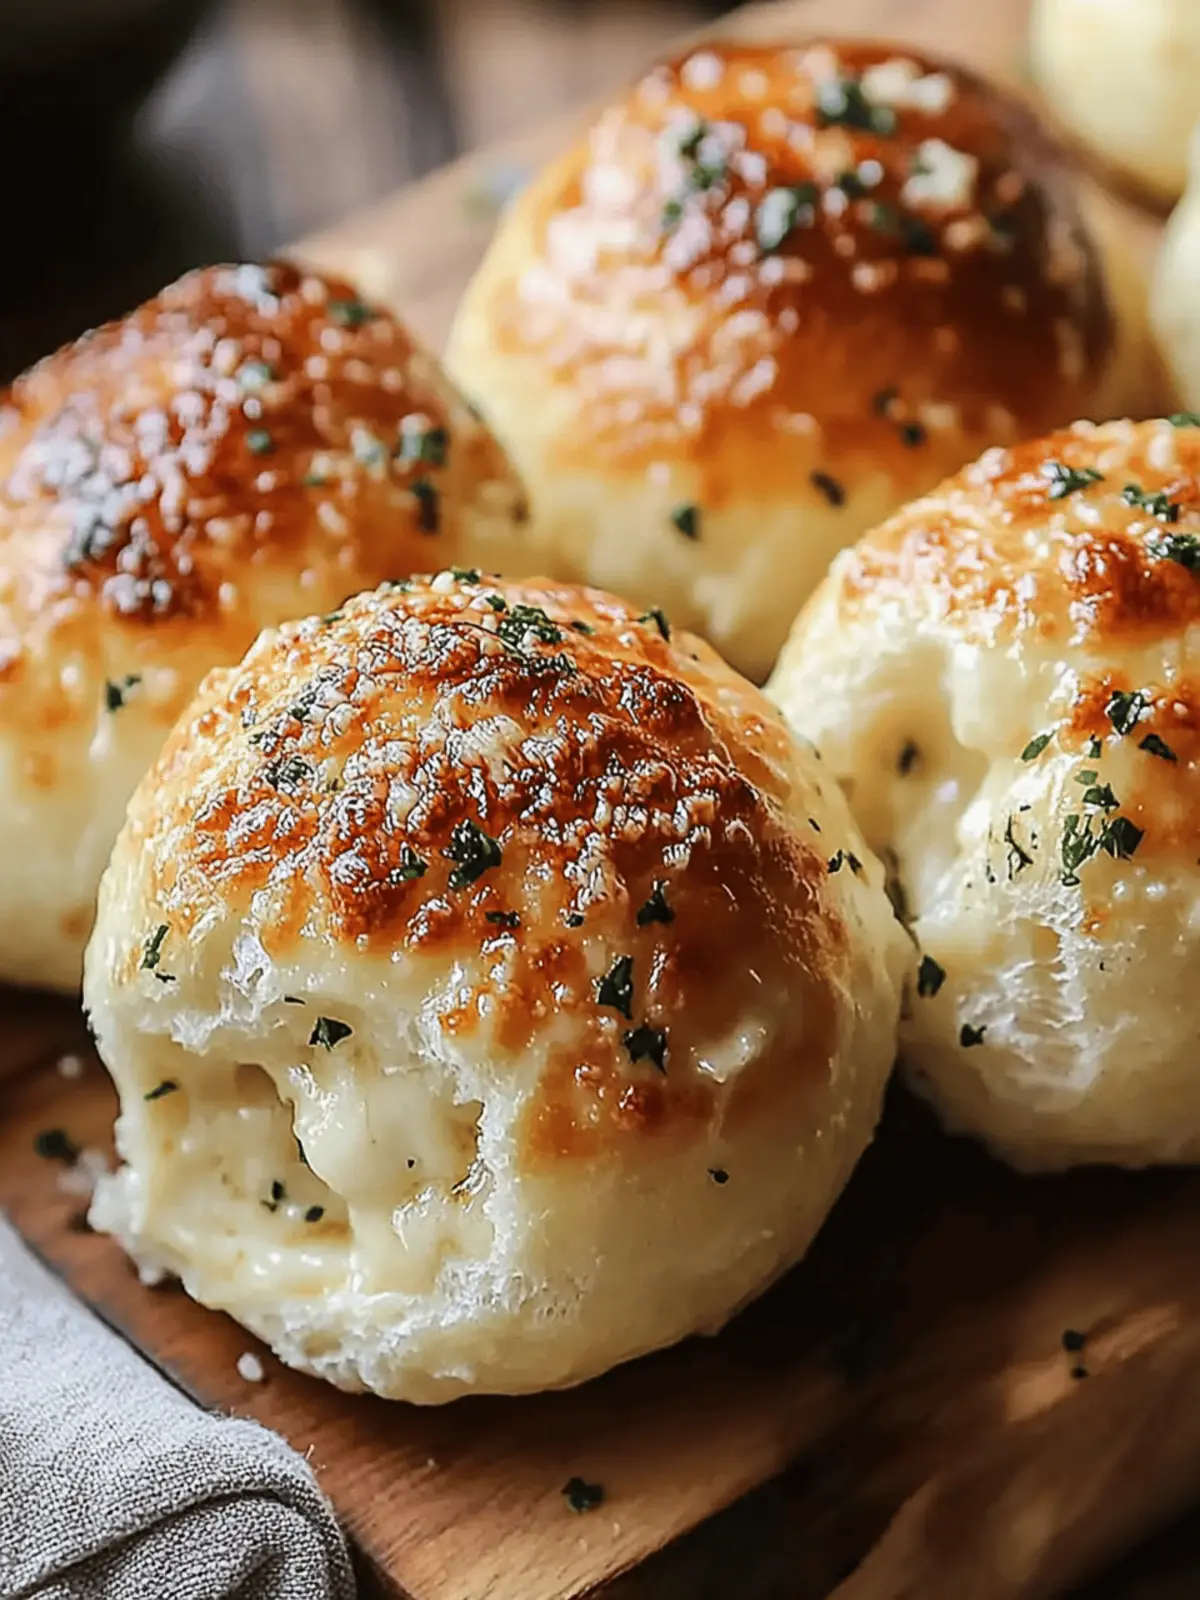
Buttery Garlic Cheese Bombs for Quick, Irresistible Snacking
Ingredients
Equipment
Method
- Preheat your air fryer to 350°F (175°C).
- Cut the cheese into small cubes.
- Separate the pieces of biscuit dough.
- Wrap each cheese cube with a piece of dough, sealing it tightly.
- Dip each ball into melted butter.
- Sprinkle minced garlic (or garlic powder) over the tops of the cheese bombs.
- Cook for about 8-10 minutes or until golden brown.
- Garnish with chopped parsley before serving.