
There’s nothing quite like the sound of sizzling beef mingling with the rich aroma of melted cheese to bring a smile to my face. These Classic Cheeseburger Sliders have become a staple in my kitchen—perfect for game days, cozy family dinners, or simply when I’m craving something hearty and fulfilling. Each luscious bite combines juicy beef and gooey cheddar, all nestled in soft slider buns, delivering that nostalgic comfort food experience we all adore.
But what truly excites me about these sliders is their versatility. You can easily tailor them to suit any taste, whether stacking them with spicy jalapeños or experimenting with your favorite cheeses. And the best part? They come together quickly, making them an ideal solution for busy weeknights or unexpected gatherings. So, let me share with you the secrets behind crafting these delicious morsels that are sure to please your crowd—and want for more!

Why You’ll Love These Classic Cheeseburger Sliders
Customizable to Perfection: These sliders are a blank canvas—load them up with your favorite toppings, from crispy bacon to fresh avocado, allowing everyone to create their mini masterpiece.
Quick and Easy: With a straightforward prep process, you’ll have sliders ready to serve in no time. Perfect for last-minute gatherings or busy weeknights!
Crowd-Pleasing Delight: Ideal for game days or family dinners, these sliders cater to a range of tastes, ensuring everyone leaves satisfied.
Comforting Flavor: The juicy beef, melty cheddar, and soft buns come together to evoke that nostalgic burger joint experience we all know and love.
Make-Ahead Marvel: Prepare the beef layer earlier in the day, and assemble them just before serving, freeing up your time for all the fun—check out my make-ahead tips to help you plan!
Classic Cheeseburger Sliders Ingredients
For the Beef Mixture
• Ground Beef – Provides the main protein and richness. Substitution Note: Use lean turkey or chicken for a lighter option.
• Salt – Enhances the flavor of the beef.
• Black Pepper – Adds a dash of spice; freshly ground for the best taste.
• Garlic Powder – Infuses depth and aroma into the sliders.
For the Cheese
• Cheddar Cheese – Melts beautifully, adding creaminess and flavor. Substitution Note: American, Swiss, or pepper jack cheese can also work for diverse tastes.
For the Buns
• Slider Buns – Soft texture that holds the fillings well. Substitution Note: Consider whole wheat or gluten-free buns for dietary needs.
• Butter – Brushed on buns for a golden, glossy finish. Note: Can be swapped with olive oil for a lighter option.
For the Toppings
• Dill Pickles – Adds a crunchy, tangy contrast to the savory beef. Substitution Note: Sweet pickles or banana peppers can provide a lovely twist.
• Ketchup – A classic condiment that complements the burger flavor beautifully.
• Mustard – Offers an extra zing that perfectly balances the richness of the beef.
• Onions (optional) – Sautéed for sweetness and a softer texture. Substitution Note: Raw onions can be used for a sharper bite instead.
These Classic Cheeseburger Sliders are not just easy to whip up, but they also invite a world of creativity. Dive into the deliciousness now!
How to Make Classic Cheeseburger Sliders
-
Preheat your oven to 350°F. This ensures the sliders cook evenly and become deliciously golden.
-
Mix ground beef in a bowl with salt, pepper, and garlic powder. Remember to handle it gently—overworking the meat might lead to dense sliders.
-
Press the beef mixture into a greased 9×13-inch baking dish, ensuring it’s even across the surface. Bake for 15-17 minutes or until fully cooked, then drain any excess grease.
-
Layer shredded cheddar cheese atop the hot beef, returning it to the oven just until the cheese melts. This adds a delightful creamy touch.
-
Cut the beef-cheese layer into 12 squares, making sure they stay intact for easy assembly later.
-
Arrange slider bun bottoms on a baking sheet. Optionally, sauté onions in a pan until they’re golden and fragrant—this adds a sweet touch!
-
Stack each slider by placing a beef square, followed by a dill pickle, sautéed onions (if using), and your choice of condiments. Then, crown with the bun tops!
-
Brush the assembled sliders with melted butter, giving them a beautiful finish before baking for an additional 5 minutes to warm through.
Optional: Serve with crispy fries for a classic combo!
Exact quantities are listed in the recipe card below.

Expert Tips for Classic Cheeseburger Sliders
-
Avoid Overmixing: Gently combine ground beef with seasonings to prevent dense sliders. Overworking creates a tough texture that’s less enjoyable.
-
Layer Wisely: Place wet toppings like ketchup and mustard on the meat side to prevent soggy buns. This keeps each slider perfectly balanced.
-
Sauté Onions for Flavor: While raw onions are great, sautéing them enhances sweetness and adds a rich flavor to your Classic Cheeseburger Sliders.
-
Choose Quality Cheese: Opt for a good melting cheese like cheddar or American. Quality makes a world of difference in your sliders’ creaminess.
-
Customize Toppings: Don’t hesitate to get creative! Try adding jalapeños, avocado, or even a smoky BBQ sauce for a unique twist.
Classic Cheeseburger Sliders Variations
Feel free to unleash your creativity and adapt these sliders to your liking—your taste buds will thank you!
-
Spicy Upgrade: Add sliced jalapeños or diced green chilies to the beef mixture for a delightful kick.
-
Smoky Flavor: Incorporate a touch of smoked paprika or liquid smoke into the beef for an irresistible smoky essence. Your sliders will take on a whole new depth of flavor.
-
Different Cheeses: Experiment with creamy blue cheese or tangy feta for a gourmet twist that adds boldness to each bite. The unique flavors will surprise and delight!
-
Veggie-Loaded: Swap half the beef for black beans or lentils to create a delicious vegetarian version that is just as satisfying. Trust me, even meat-lovers will enjoy this hearty option.
-
Sweet Touch: Substitute regular pickles for sweet pickles or even sliced peaches for a surprising and delightful contrast to the savory beef.
-
Herbed Delight: Add chopped fresh herbs like parsley, cilantro, or oregano to the beef mixture for an aromatic boost. It elevates the flavor profile and makes your sliders feel extra special.
-
BBQ Twist: Instead of ketchup and mustard, use your favorite BBQ sauce to create a smoky, tangy experience that’ll please your crowd every time.
-
Crunchy Finish: Top with crispy fried onions or potato chips just before serving for an addictive crunch that your guests won’t be able to resist. Your sliders will have that perfect texture contrast!
Make Ahead Options
These Classic Cheeseburger Sliders are perfect for busy home cooks looking to save time during the week! You can prepare the beef mixture up to 24 hours in advance; simply mix the ground beef with seasonings and press it into your baking dish, then cover and refrigerate. On the day of serving, bake it and melt the cheese just before assembling. Additionally, the slider buns can be assembled and stored in the fridge for up to 3 days; wrap them tightly with plastic wrap to maintain freshness. When ready to serve, simply brush them with butter and bake until warmed through. This method not only saves you precious time but also ensures your sliders are just as delicious!
What to Serve with Classic Cheeseburger Sliders?
Elevate your slider experience with delicious pairings that complement the bold flavors of these delightful mini-burgers.
-
Crispy French Fries: A classic side, their golden crunch provides a satisfying contrast to the hearty sliders. Dipped in ketchup, they enhance the nostalgic fast-food feel.
-
Tangy Coleslaw: This creamy, crunchy side brings freshness and a zesty kick, balancing the richness of the sliders perfectly. It’s a delightful salad to brighten up your plate!
-
Sweet Potato Wedges: Their natural sweetness pairs beautifully with savory cheeseburgers, adding a distinct flavor that feels both gourmet and comforting.
-
Grilled Vegetable Skewers: Seasoned and charred veggies add a touch of smokiness and vibrant color to your meal, offering a healthy and flavorful contrast.
-
Classic Potato Salad: Creamy and comforting, this traditional side evokes summer barbecues and complements the sliders’ juicy character. It’s a well-loved favorite!
-
Chilled Beer or Iced Tea: Pairing these with the sliders creates a relaxed atmosphere, from game days to backyard gatherings. The refreshing notes of a cold drink are essential!
-
Chocolate Chip Cookies: For a sweet ending, these warm, gooey cookies provide a delightful contrast to your meal. Who can resist this classic dessert?
-
Fruit Salad: A light and refreshing choice that cleanses the palate, bringing a burst of sweetness that pairs nicely with the savory sliders.
Storage Tips for Classic Cheeseburger Sliders
Room Temperature: Leftover sliders can be kept at room temperature for up to 2 hours. After that, they should be refrigerated to ensure safety.
Fridge: Store your Classic Cheeseburger Sliders in an airtight container in the refrigerator for up to 3 days. This helps maintain their delicious texture and flavor.
Freezer: For longer storage, freeze the sliders in an airtight container for up to 2 months. Wrap them individually for easy reheating later.
Reheating: When ready to enjoy, reheat sliders in a 350°F oven for about 10 minutes to restore their warmth and soft texture. Avoid the microwave, as it can make them soggy.

Classic Cheeseburger Sliders Recipe FAQs
How do I choose the right ground beef for Classic Cheeseburger Sliders?
Absolutely! For the juiciest and most flavorful sliders, select ground beef with a fat content of around 80/20. This ensures enough fat to keep your sliders moist and delicious while grilling. If you’re looking for a lighter option, lean ground turkey or chicken works beautifully, just remember to adjust seasonings to prevent them from being bland.
What’s the best way to store leftover Classic Cheeseburger Sliders?
To keep your sliders fresh, store them in an airtight container in the refrigerator for up to 3 days. This helps maintain their delightful texture and flavor. I often add a layer of parchment paper between sliders to preserve the buns—just a little extra care goes a long way!
Can I freeze Classic Cheeseburger Sliders?
Certainly! To freeze your sliders, individually wrap each one in plastic wrap or foil, then place them in an airtight freezer bag. They can be frozen for up to 2 months. When you’re ready to enjoy, simply reheat them in a preheated 350°F oven for about 10 minutes, so they come out warm and inviting.
What should I do if my sliders are soggy?
The more the merrier, but soggy sliders can be a disappointment! To prevent this, make sure to avoid placing wet toppings, like ketchup or mustard, directly on the bottom bun. Instead, layer them on the meat side. If you’ve already made them soggy, simply toast the assembled sliders in a hot skillet for a minute on each side—this can help crisp up the buns and save your meal!
Are Classic Cheeseburger Sliders safe for my dietary needs?
Very! These sliders are nut-free, making them a great option for those with nut allergies. For anyone with gluten sensitivities, just substitute regular buns with gluten-free varieties. Additionally, always check labels on condiments and cheese for potential allergens to ensure a safe and tasty meal!
How can I customize my Classic Cheeseburger Sliders for different tastes?
Feel free to get creative! Add spicy jalapeños or barbecue sauce for a kick, or top with avocado for creaminess. You can also alter the cheese choice—try pepper jack for heat or Swiss for a milder flavor. Don’t be afraid to experiment with toppings like crispy bacon or sautéed mushrooms for a personal touch; the possibilities are endless!
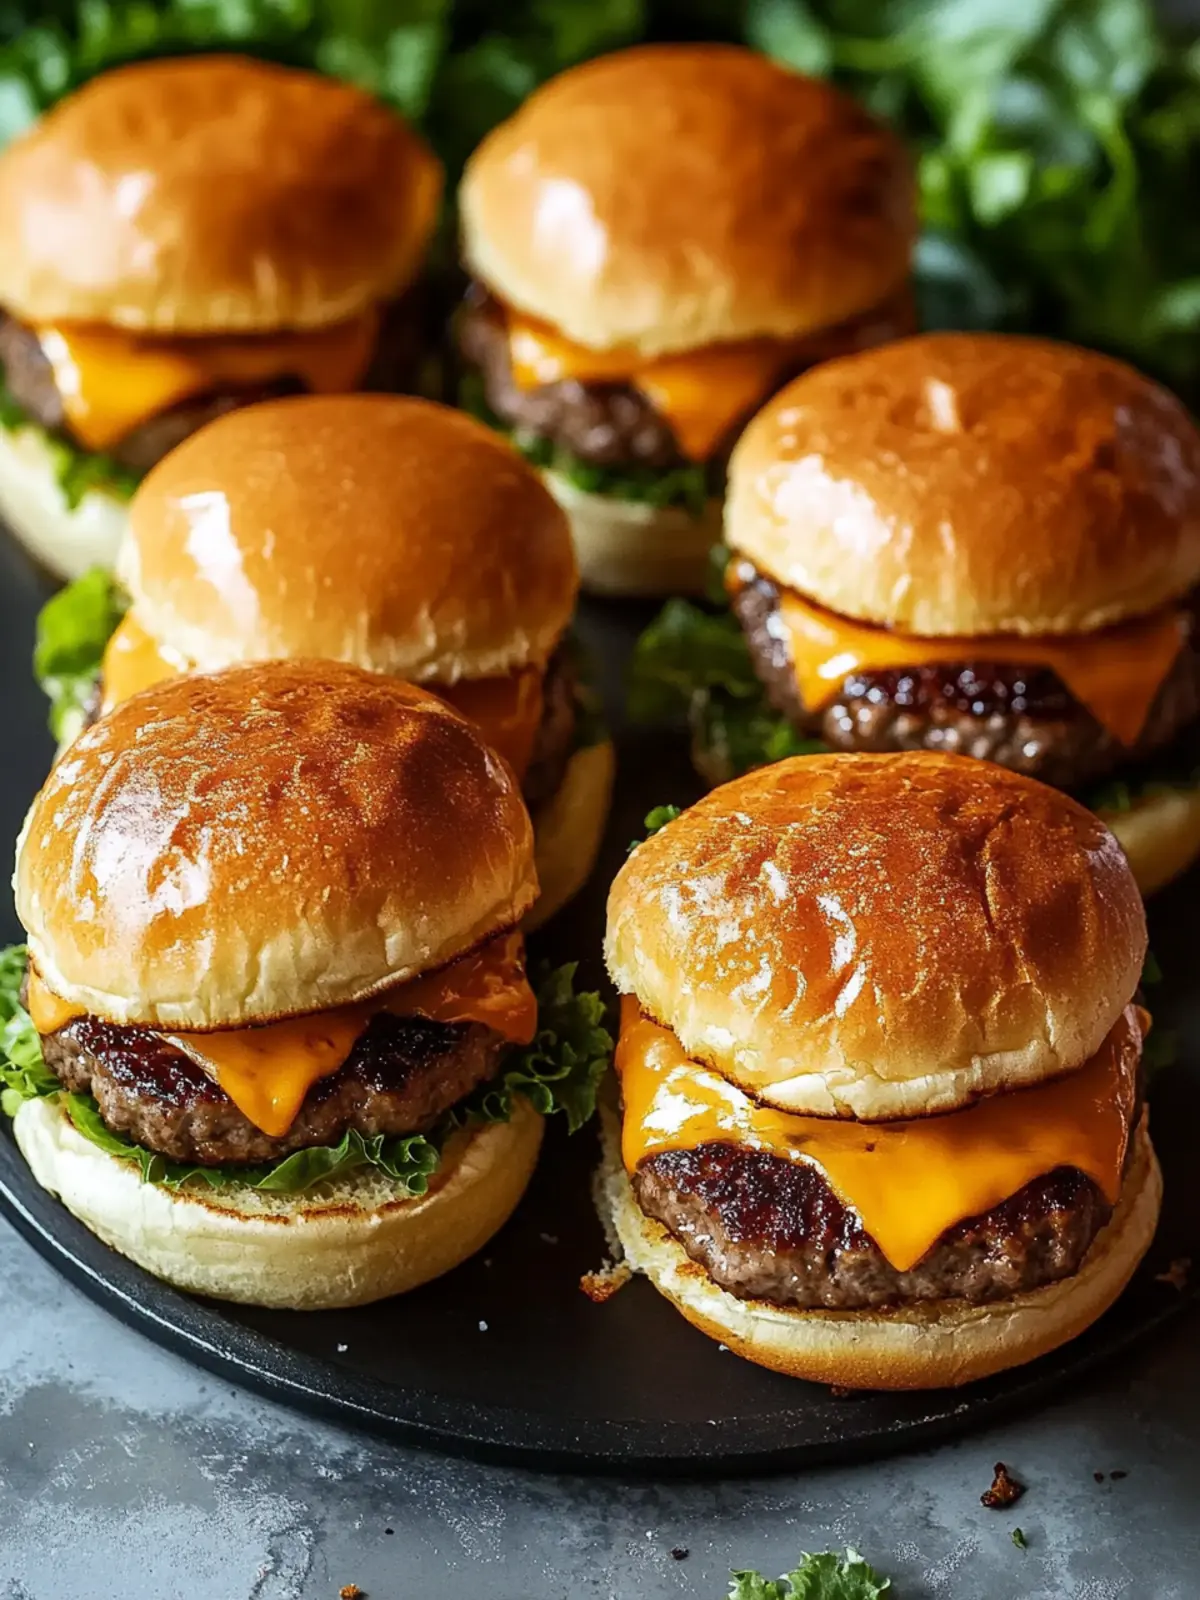
Classic Cheeseburger Sliders: Ultimate Game Day Delight
Ingredients
Equipment
Method
- Preheat your oven to 350°F. This ensures the sliders cook evenly and become deliciously golden.
- Mix ground beef in a bowl with salt, pepper, and garlic powder. Remember to handle it gently—overworking the meat might lead to dense sliders.
- Press the beef mixture into a greased 9x13-inch baking dish, ensuring it's even across the surface. Bake for 15-17 minutes or until fully cooked, then drain any excess grease.
- Layer shredded cheddar cheese atop the hot beef, returning it to the oven just until the cheese melts.
- Cut the beef-cheese layer into 12 squares, making sure they stay intact for easy assembly later.
- Arrange slider bun bottoms on a baking sheet. Optionally, sauté onions in a pan until they’re golden and fragrant.
- Stack each slider by placing a beef square, followed by a dill pickle, sautéed onions (if using), and your choice of condiments. Then, crown with the bun tops!
- Brush the assembled sliders with melted butter, giving them a beautiful finish before baking for an additional 5 minutes to warm through.