
Coconut Cake Vape Recipes
Introduction to the Topic
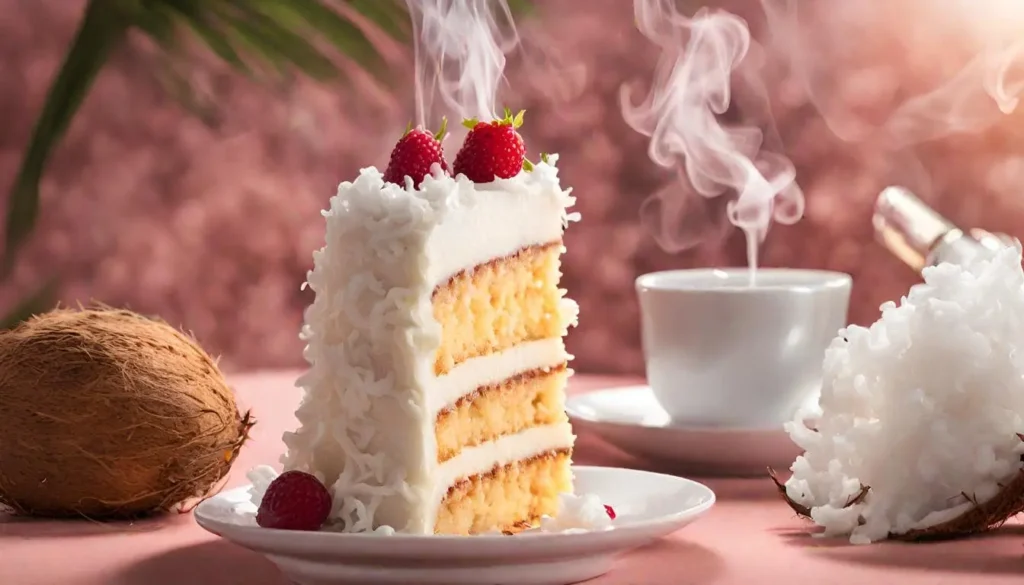
Vaping enthusiasts are constantly on the lookout for new flavors to tantalize their taste buds. Enter the coconut cake vape recipe – a unique blend that marries the tropical zest of coconut with the rich, indulgent sweetness of cake. This fusion creates an e-liquid flavor that’s both exotic and familiar, making it a hot favorite in the DIY vaping community.
The Rising Popularity of DIY Vape Recipes
Why are DIY vape recipes like the coconut cake concoction gaining such momentum? Well, it’s simple! Vapers are seeking more than just the run-of-the-mill flavors available commercially. They’re yearning for something that hits the sweet spot in terms of taste, personalization, and the joy of creation. DIY vape recipes offer a canvas for creativity, allowing individuals to experiment with an array of flavor profiles and concoctions. In a way, it’s like being a chef, but for your vape!
Benefits of Making Your Own Vape Juice
The perks of diving into the world of DIY vape juice creation are manifold. Firstly, it’s a playground for customization. You get to decide the intensity and nuances of your flavor – whether you want a more pronounced coconut punch or a subtle, cakey undertone. Secondly, it’s surprisingly cost-effective in the long run, especially if vaping is a regular part of your lifestyle. Lastly, there’s the aspect of quality control. When you’re the one behind the mixing desk, you know exactly what’s going into your vape juice – no hidden nasties or unwelcome surprises.

Essential Ingredients and Tools
Key Ingredients for Coconut Cake Vape Juice
In the enchanting world of DIY vape juice, the right ingredients are the soul of your creation. For a tantalizing coconut cake vape juice, a few key components are essential.
- Coconut Flavor Concentrate: The star of the show, this concentrate infuses the liquid with the tropical essence of coconut. It’s crucial to pick a high-quality concentrate that mirrors the natural sweetness and richness of coconut without veering into artificial territory.
- Vanilla Custard Concentrate: This adds a luxurious, creamy depth, reminiscent of the heartwarming filling in a coconut cake.
- Sweet Cream Concentrate: A touch of this enhances the richness, smoothing out the flavors and adding a hint of decadent creaminess.
- Cake Batter Flavoring: While optional, this ingredient brings in the cozy, buttery notes of cake, making the vape juice a true dessert in a cloud.
- VG/PG Base: The base of your e-liquid, the VG (Vegetable Glycerin) and PG (Propylene Glycol) ratio, can be tailored to your preference. A higher VG ratio produces thicker vapor clouds, while a higher PG ratio accentuates the flavor profile.
Tools Needed for DIY Vape Juice Making
Crafting your own vape juice is an art, and like any artist, you need the right tools. Here’s what you’ll need to start your DIY journey:
- Measuring Instruments: Precision is key! Use syringes or pipettes for accurate measurement of liquids. For flavor concentrates, which are often used in smaller quantities, precision droppers come in handy.
- Mixing Containers: You’ll need clean, sterile containers for mixing your ingredients. Glass bottles are preferred as they don’t react with the ingredients and are easy to clean.
- A Digital Scale: If you’re a stickler for accuracy, a digital scale is a must. It ensures each ingredient is measured precisely, which is crucial for consistency in flavor.
- Gloves and Safety Gear: Safety first! Gloves protect your skin from nicotine and other ingredients. Additionally, consider wearing safety goggles when handling nicotine or other potentially irritating substances.
- Storage Bottles: Once your vape juice is mixed, you’ll need bottles for storage. Dark, glass bottles are ideal as they protect the e-liquid from light, which can degrade the quality over time.
- Labels and Markers: Keep track of your concoctions by labeling your bottles. Note the flavor, PG/VG ratio, nicotine strength, and the date of mixing.
Step-by-Step Coconut Cake Vape Recipe Guide
Basic Coconut Cake Vape Recipe
Ready to whip up your own coconut cake vape juice? Here’s a step-by-step guide to create this delightful concoction:
- Gather Your Ingredients: Make sure you have all the key ingredients – coconut flavor concentrate, vanilla custard concentrate, sweet cream concentrate, and optionally, cake batter flavoring. Don’t forget your VG/PG base.
- Start with the Base: Begin by preparing your VG/PG mixture. The ratio depends on your preference; a common starting point is 70% VG to 30% PG for a smoother, thicker vapor.
- Add the Flavors: Now, the fun part! Start by adding the coconut flavor concentrate. A good rule of thumb is to begin with a 10% concentration of the total volume of your e-liquid. So, for a 10ml batch, use 1ml of coconut concentrate.
- Layer in Complexity: Next, introduce the vanilla custard and sweet cream concentrates. These should be used more sparingly – start with about 2-3% of each for a 10ml batch.
- Optional Cake Batter Addition: If you’re using cake batter flavoring, a little goes a long way. Start with just a drop or two.
- Mix and Shake: Once all ingredients are in, seal your bottle and give it a vigorous shake. This ensures everything is thoroughly mixed.
- Steep for Perfection: Patience is key. Let your mixture steep for at least a week. Steeping allows the flavors to meld and deepen, bringing out the richness and complexity of your vape juice.
- Taste and Adjust: After steeping, give it a taste. If the flavors aren’t quite right, adjust them slightly and steep again.
Tips for Customizing Your Recipe
Crafting the perfect vape juice is all about tweaking and experimenting. Here’s how you can customize your coconut cake vape recipe:
- Adjust Flavor Concentrations: If the coconut flavor is too overpowering or too subtle, adjust its concentration. You can do the same with the vanilla custard and sweet cream concentrates.
- Experiment with Additional Flavors: Don’t be afraid to get creative! Adding a drop of almond or hazelnut flavoring can introduce a nutty undertone. For a more tropical twist, a hint of pineapple or mango can brighten the flavor profile.
- Play with PG/VG Ratios: If you prefer a stronger throat hit and more pronounced flavor, increase the PG ratio. For larger vapor clouds and a smoother hit, go heavier on the VG.
- Consider Nicotine Strength: If you use nicotine, start with a lower strength and adjust according to your preference. Nicotine can affect the overall flavor of your e-liquid.
- The Art of Steeping: Steeping time can dramatically alter the flavor. If you’re not satisfied after the initial steep, let it sit for a few more days. Sometimes, the flavors need more time to fully develop.
Troubleshooting Common DIY Vaping Issues
Common Challenges in DIY Vape Juice Making
Even the most seasoned DIY vapers can encounter a few bumps along the road. Here are some common challenges you might face:
- Flavor Imbalance: Sometimes, your vape juice might taste too intense or too bland. This is often a result of incorrect flavor concentrations.
- Nicotine Strength Issues: Getting the right nicotine strength is crucial for a satisfying vape. Too much nicotine can overpower the flavors, while too little might not provide the desired hit.
- Consistency Problems: The viscosity of your vape juice is important. Too thin, and it might leak from the tank or produce a harsh throat hit; too thick, and it might not wick well in your device.
- Steeping Woes: An improperly steeped vape juice can taste unbalanced or underdeveloped.
- Storage Mishaps: Incorrect storage can lead to the degradation of flavors or nicotine strength over time.
Solutions and Best Practices
Fortunately, these challenges are easily rectifiable with some know-how:
- Adjusting Flavor Ratios: If the flavor isn’t quite right, adjust the concentration of your flavorings. Remember, it’s easier to add more flavor than to remove it, so start low and go slow.
- Finding the Right Nicotine Level: Experiment with different nicotine strengths. If you’re new to mixing, start with lower concentrations and gradually increase if needed.
- Correcting Consistency: The VG/PG ratio greatly influences the viscosity of your juice. For a thinner consistency, increase the PG; for thicker juice, up the VG.
- Mastering Steeping Techniques: Steep your juice in a cool, dark place. Shake the bottle occasionally and let it sit for at least a week. Some complex flavors might benefit from longer steeping.
- Proper Storage Tips: Store your vape juice in dark glass bottles away from direct sunlight and extreme temperatures. This helps in preserving the flavor and nicotine integrity over time.
User Experiences and Reviews
Feedback from Vapers Who Tried Coconut Cake Recipes
The DIY vaping community is buzzing with enthusiasm over the coconut cake vape recipe, and vapers aren’t shy about sharing their experiences. Here’s a taste of the feedback:
- “Absolutely Delightful”: Many vapers rave about the authentic taste of the coconut cake recipe. “It’s like a tropical holiday in each puff,” says one user, who was thrilled with the perfect balance between the sweetness of coconut and the rich, buttery notes of cake.
- “A Hit at Vape Meets”: Another vaper shared how their coconut cake creation became the talk of the town at a local vape meet, with several fellow enthusiasts asking for the recipe.
- “Better than Store-Bought”: A common sentiment among DIYers is the superiority of their homemade concoctions over commercial e-liquids. “I can control the sweetness and flavor intensity, which makes all the difference,” remarks a satisfied mixer.
Success Stories and Creative Variations
The realm of DIY vaping is fertile ground for creativity, and the coconut cake recipe is no exception. Here are some success stories:
- “My Signature Blend”: One vaper proudly talks about adding a hint of cinnamon and caramel to their coconut cake recipe, creating what they now call their signature blend.
- “Experimentation Pays Off”: Another mixer experimented with various PG/VG ratios and steeping times before landing on their ideal version, describing the journey as “immensely satisfying.”
- “Non-Vapers Love It Too”: A particularly heartwarming story comes from a vaper whose non-vaping friends were so enamored with the aroma of their coconut cake vape juice that it sparked a lively conversation about the joys of DIY e-liquid mixing.
These testimonials and stories highlight not just the popularity of the coconut cake vape recipe, but also the rewarding nature of DIY vaping. In the next segment, we’ll delve into the nuances of comparing homemade and commercial e-liquids.
FAQs
Commonly Asked Questions About Coconut Cake Vape Recipes
Q: What makes a good coconut flavor concentrate for this recipe? A: For a top-notch coconut cake vape juice, you should ideally choose a natural, bakery-grade coconut concentrate. It’s essential to avoid those with artificial sweetness and instead opt for ones known for their high-quality flavorings, capturing the true essence of coconut.
Q: Is steeping really necessary for this recipe? A: Indeed, steeping is an essential step. It allows the flavors to meld and mature, significantly enhancing the overall taste. While a minimum of 24 hours is recommended, optimally, you should steep for 48-72 hours to ensure the flavors develop fully.
Q: How do I adjust the PG/VG ratio for this recipe? A: The PG/VG ratio should be tailored to your personal preference. If you prefer thicker vapor clouds, a higher VG ratio (like 70/30) is advisable. Conversely, if you’re looking for a stronger throat hit and more pronounced flavor, a higher PG ratio would be more suitable.
Q: How long will the coconut cake e-liquid last once made? A: If stored correctly in a cool, dark place, the e-liquid can last for several weeks. However, bear in mind that its freshness is paramount. Therefore, it’s advisable not to make huge batches unless you vape frequently.
Q: I’m allergic to nuts. Can I still enjoy this recipe? A: Yes, you can. If the recipe includes any nut flavorings and you’re allergic, simply exclude them. The recipe will still tantalize your taste buds with the primary flavors of coconut and cake.
Q: Is it okay to add other ingredients to this recipe? A: Certainly! Feel free to experiment by adding other flavors that complement coconut cake, such as cinnamon, nutmeg, banana, or pineapple. The beauty of DIY vaping lies in customization and the freedom to be creative.
Conclusion
As we wrap up our comprehensive journey through the delightful world of DIY coconut cake vape recipes, it’s clear that this venture offers much more than just a means to an end. It’s an exploration of flavors, a test of creativity, and a deeply satisfying personal achievement. From selecting the finest ingredients to mastering the art of steeping and flavor balancing, each step in the process is a learning experience, an opportunity to customize and perfect your own unique blend.
The beauty of DIY vaping lies not just in the customization of flavors but also in the community and shared experiences it fosters. Vapers around the globe, from novices to seasoned mixers, engage in this creative process, sharing tips, successes, and even the occasional mishap, all in the spirit of achieving that perfect vape experience.
In essence, DIY coconut cake vape recipes embody the essence of innovation and personal expression within the vaping community. It’s a testament to how a simple hobby can evolve into a passionate pursuit of flavor perfection. Whether you’re a first-timer or a DIY veteran, the journey of creating your own vape juice is as rewarding as the destination.