
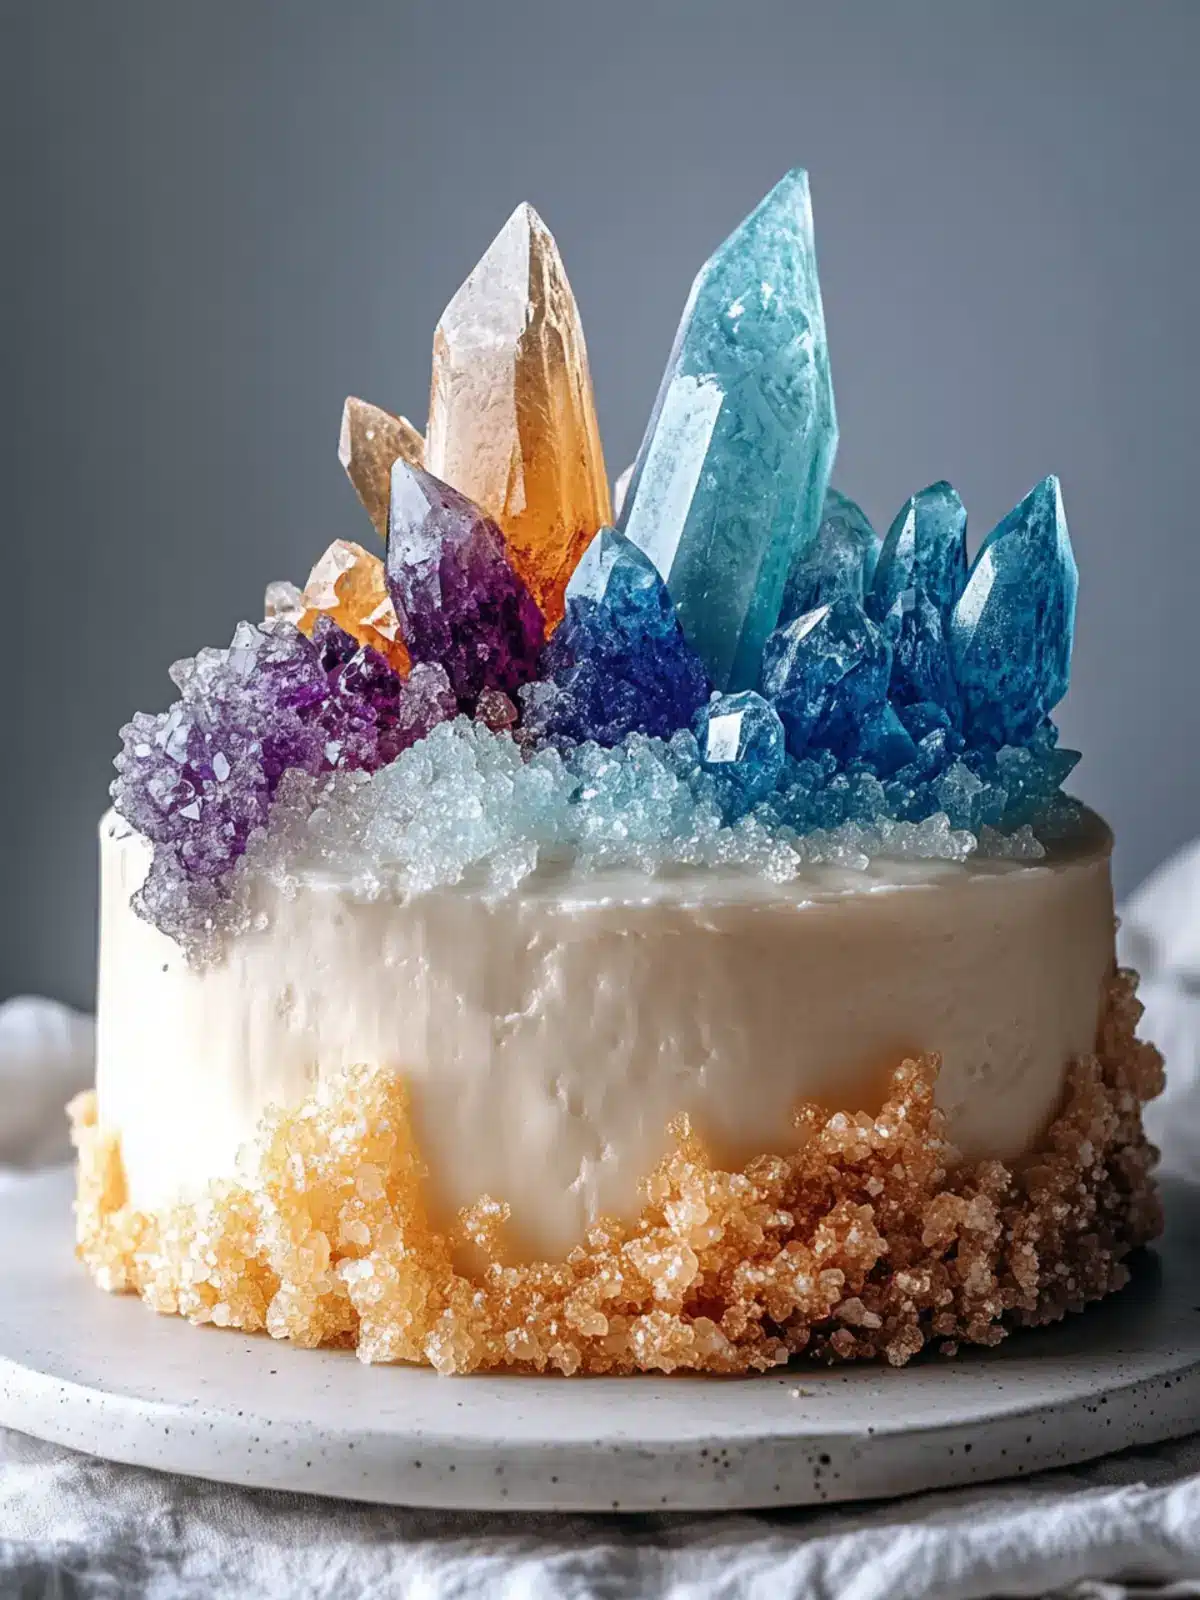
When I first laid eyes on the stunning Crystal Candy Geode Cake, it was like discovering a secret treasure tucked away in the world of desserts. The combination of vibrant rock candy formations and delicate layers of rich cake caught my breath! Each slice unveils a symphony of textures—from the soft cake and creamy frosting to the irresistible crunch of candy crystals. This dessert is not just a feast for the taste buds; it’s a true show-stopper for any celebration, whether it’s a birthday bash or a wedding reception.
Inspired by the allure of geodes, I’ve created this cake to not only satisfy your sweet tooth but also to impress your guests with its artistic flair. Plus, it’s surprisingly easy to make! Perfect for anyone who craves homemade goodness over fast food, this cake allows you to explore your creativity in the kitchen while creating a dessert that is as beautiful as it is delicious. Get ready to add a dazzling centerpiece to your next gathering with this captivating and customizable treat!

Why will you love this Crystal Candy Geode Cake?
Visual Delight: This cake is a true eye-catcher, featuring stunning rock candy formations that mimic natural geodes.
Textural Contrast: Enjoy the perfect balance of soft cake, rich frosting, and crunchy candy crystals in every bite.
Customizable Fun: Easily adapt the flavors or decorations to suit your event, making it a unique creation.
Simple Process: With easy-to-follow steps, even novice bakers can achieve impressive results.
Party Star: Whether for birthdays or weddings, it’s guaranteed to delight your guests and spark conversation.
Elevate your dessert game and check out our other show-stopping dessert recipes for more inspiring ideas!
Crystal Candy Geode Cake Ingredients
For the Cake
- All-purpose flour – Provides structure and texture. Substitute with gluten-free flour for a gluten-free option.
- Granulated sugar – Adds sweetness and moisture. Can be replaced with coconut sugar for a less refined option.
- Baking powder – Acts as a leavening agent. Make sure it’s fresh for maximum rise.
- Salt – Enhances flavor. Use kosher salt or sea salt.
- Unsalted butter – Contributes richness and moisture. Substitute with vegan butter for a dairy-free version.
- Eggs – Adds structure and helps with rising. Use aquafaba (3 tbsp per egg) for a vegan alternative.
- Vanilla extract – Provides flavor depth. Can be substituted with almond extract for a different flavor profile.
- Buttermilk – Adds moisture and tanginess. Use milk with vinegar or lemon juice as a substitute.
For the Buttercream Frosting
- Unsalted butter (softened) – Main fat for creamy texture. Use vegan butter for a dairy-free version.
- Cream cheese (optional) – Adds tanginess and richness. Omit if using standard buttercream.
- Powdered sugar – Sweetens and thickens frosting. Can be replaced with powdered monk fruit sweetener.
- Heavy cream or milk – Adjusts consistency. Use almond milk for a dairy-free version.
For the Geode Decoration
- Rock candy crystals – Creates the geode effect—can use clear or white rock candy.
- Gel food coloring – For coloring the rock candy—ensure it’s food-safe.
- Clear extract – Helps with color dilution.
- Edible metallic leaf/paint – For accentuation of the geode design—omit if desired.
Now that you have all the ingredients lined up, let’s dive into the joyful process of bringing this magnificent Crystal Candy Geode Cake to life!
How to Make Crystal Candy Geode Cake
-
Preheat and Prepare: Start by preheating your oven to 350°F (175°C). Grease and line your cake pans with parchment paper—this ensures your cake layers slide out smoothly once baked.
-
Mix Dry Ingredients: In a large bowl, whisk together the all-purpose flour, granulated sugar, baking powder, and salt. This creates a uniform mixture that will help your cake rise perfectly.
-
Cream Wet Ingredients: In another bowl, beat the softened unsalted butter with eggs and vanilla extract until creamy. If you’re using cream cheese, add it now for extra richness.
-
Combine Mixtures: Gradually incorporate the dry ingredients into the wet mixture, alternating with buttermilk. Mix until just combined, taking care not to overmix for a tender cake.
-
Bake the Layers: Evenly distribute the batter into prepared pans and bake for 30-40 minutes. Check for doneness by inserting a toothpick; it should come out clean. Let the layers cool completely in the pans.
-
Prepare the Frosting: In a mixing bowl, beat softened butter with cream cheese (if using) until smooth. Gradually add powdered sugar and continue mixing until fluffy. Adjust the consistency with heavy cream or milk as needed.
-
Layer and Crumb Coat: If necessary, level the cooled cake layers. Frost between the layers and apply a thin crumb coat on the outside. Chill the cake to set the frosting.
-
Carve for Geode Shape: Once the cake is firm, carefully carve an irregular shape into one side to create the geode effect. Fill the carved space with frosting as a base.
-
Add Rock Candy: Press the rock candy crystals into the carved section, starting from the outside and working inward to build depth and dimension.
-
Color and Final Touches: Using gel food coloring, tint your rock candy. Apply darker shades deeper into the geode for a realistic look. If desired, add edible metallic accents for a dazzling finish.
-
Chill Before Serving: Chill the cake briefly to firm up your decorations before slicing. Serve at room temperature for the best texture experience.
Optional: Drizzle with a simple syrup for added moisture on each layer.
Exact quantities are listed in the recipe card below.

Make Ahead Options
Preparing the Crystal Candy Geode Cake in advance can save you precious time on the day of your celebration! You can bake the cake layers and wrap them tightly in plastic wrap, storing them in the refrigerator for up to 3 days or freeze them for up to 3 months. Additionally, the buttercream frosting can be made ahead and kept in the fridge for up to 5 days; just give it a good stir before using. When you’re ready to assemble, simply frost the chilled layers, carve out the geode shape, and add the rock candy. This way, you’ll have a stunning dessert that’s just as delicious and visually appealing, all with minimal effort when it’s time to serve!
How to Store and Freeze Crystal Candy Geode Cake
Fridge: Store any leftover cake in an airtight container in the fridge for up to 3 days to maintain freshness and prevent drying out.
Freezer: If you have surplus cake layers, wrap them tightly in plastic wrap and foil, then freeze for up to 2 months. Thaw in the fridge before assembling or serving.
Reheating: For the best taste and texture, serve the cake at room temperature after storing in the refrigerator or freezer. Avoid microwave reheating, as it can soften candy decorations.
Cake Components: You can make the cake layers and even the buttercream frosting a day in advance. Just keep them separately wrapped to ensure the Crystal Candy Geode Cake comes together beautifully on the day of serving.
What to Serve with Crystal Candy Geode Cake?
Imagine the warm laughter of friends and family gathered around, indulging in delightful treats that complement the stunning centerpiece of your gorgeous cake.
-
Vanilla Ice Cream: The creamy richness of vanilla ice cream balances the sweetness and provides a refreshing contrast to the sugary crunch of the geode cake.
-
Fresh Berries: A medley of tart berries like raspberries and strawberries cuts through the sweetness of the cake, adding a burst of freshness that enhances the dessert experience.
-
Sparkling Lemonade: This fizzy drink not only quenches your thirst but its citrus notes complement the cake’s sweetness beautifully, making each bite feel vibrant and lively.
-
Chocolate Ganache: Drizzling warm chocolate ganache adds a luxurious touch, enriching the flavor and providing a smooth contrast to the crunchy texture of the candy geodes.
-
Whipped Cream: Light and fluffy whipped cream is a classic pairing, adding a silky texture that melds perfectly with the layers of cake and frosting.
-
Caramel Sauce: A drizzle of rich caramel brings a sweet and salty dimension to each bite, inviting guests to explore contrasting flavors with every mouthful.
-
Cheese Platter: Unconventional yet delightful, a cheese platter featuring mild cheeses can act as a savory counterpart, balancing out the cake’s sweet profile.
-
Almond Cookies: These subtly sweet and crunchy cookies make an inviting side treat, perfect for nibbling alongside your Crystal Candy Geode Cake during a festive gathering.
-
Iced Tea: A refreshing glass of iced tea, whether sweetened or herbal, provides a light and thirst-quenching complement to the indulgence of the cake, rounding out the meal in a pleasant way.
Crystal Candy Geode Cake Variations
Feel free to unleash your creativity with these delightful twists to make your cake truly your own!
-
Flavor Swaps: Experiment with chocolate or lemon cake flavors for a delightful twist.
-
Frosting Fun: Use flavored frostings like raspberry or peppermint for added zing. Imagine the burst of flavor that will accompany the visuals!
-
Sugar Shards: Replace rock candy with edible sugar shards for a different aesthetic. This adds a touch of whimsy.
-
Mini Geodes: Create smaller geode shapes throughout the cake instead of one large carving. It’s a delightful surprise in every slice!
-
Nuts or Seeds: Incorporate crushed nuts or seeds into the cake batter for added texture and a nutty flavor. Almonds or pecans work beautifully.
-
Citrus Zest: Add lemon or orange zest into the batter for a fresh, zesty note to balance the sweetness. It’s like a burst of sunshine in every bite!
-
Spicy Kick: Introduce a hint of cinnamon or nutmeg in the batter for a warm, aromatic twist that pairs perfectly with the sweetness of the cake.
-
Gluten-Free Delight: For a gluten-free option, simply swap the all-purpose flour with a gluten-free blend, ensuring everyone can enjoy this stunning cake!
Expert Tips for Making Crystal Candy Geode Cake
- Cool Before Carving: Allow the cake layers to cool completely before carving. This ensures cleaner cuts and makes handling easier as you shape the geode.
- Cover Crumbs: Apply a thin crumb coat before the final frosting to trap any stray crumbs. This helps achieve a clean, polished finish.
- Color with Care: When coloring rock candy, use minimal liquid in the gel food coloring to prevent running colors. Let your candy dry completely before handling.
- Use Fresh Ingredients: Ensure your baking powder is fresh for optimal rise, which contributes to the cake’s light texture—a key aspect of your Crystal Candy Geode Cake.
- Chill for Stability: Briefly chill the decorated cake to set the rock candy and keep it crisp, but avoid exposing it to moisture, which could soften the candy.
Crystal Candy Geode Cake Recipe FAQs
What type of flour is best for this cake?
All-purpose flour is the standard for this recipe as it provides the right structure and texture. If you require a gluten-free cake, feel free to substitute it with a gluten-free flour blend. Just ensure that the flour you choose is specifically designed for baking to maintain the cake’s integrity.
How should I store the leftover Crystal Candy Geode Cake?
To keep your leftover cake fresh, store it in an airtight container in the refrigerator for up to 3 days. This will prevent it from drying out and help retain the delicious flavors. Before serving again, let it come to room temperature for the best texture.
Can I freeze the cake for later use?
Absolutely! If you have excess cake layers or want to prepare ahead, wrap each layer tightly in plastic wrap and then in aluminum foil. You can freeze them for up to 2 months. When you’re ready to enjoy your cake, simply thaw it in the fridge overnight. This method ensures that the cake stays moist and delicious!
Is it possible to make this cake dairy-free?
Yes! You can easily make the Crystal Candy Geode Cake dairy-free by using vegan butter instead of unsalted butter and replacing the buttermilk with a non-dairy alternative, such as almond milk mixed with a bit of vinegar. Follow the same measurements as you would for regular dairy products. This way, everyone can join the celebration, feeling good about their dessert!
What do I do if my cake layers sink in the center?
If your cake layers sink, it could be due to an incorrect oven temperature or overmixing the batter. Always use an oven thermometer to ensure accurate heat levels. For perfectly risen layers, mix just until combined—overmixing can introduce air bubbles that might cause collapsing. If it does sink, you can disguise it with extra frosting or rock candy decorations for a stunning finish!
How can I customize the colors of the rock candy?
To achieve the desired colors for your geode decoration, use gel food coloring, which can be mixed into the rock candy. Start by adding a small amount of coloring and gradually increase until you reach your desired hue. For a realistic effect, apply darker colors deeper into the geode shape and lighter shades on the outer edges, giving it a lovely ombre look.

Crystal Candy Geode Cake
Ingredients
Equipment
Method
- Preheat your oven to 350°F (175°C). Grease and line your cake pans with parchment paper.
- In a large bowl, whisk together the all-purpose flour, granulated sugar, baking powder, and salt.
- In another bowl, beat the softened unsalted butter with eggs and vanilla extract until creamy.
- Gradually incorporate the dry ingredients into the wet mixture, alternating with buttermilk. Mix until just combined.
- Evenly distribute the batter into prepared pans and bake for 30-40 minutes.
- In a mixing bowl, beat softened butter with cream cheese (if using) until smooth. Gradually add powdered sugar.
- Once layers are cooled, level them if necessary and frost between the layers.
- Carefully carve an irregular shape into one side to create the geode effect.
- Press the rock candy crystals into the carved section, starting from the outside and working inward.
- Using gel food coloring, tint your rock candy. Apply colors as desired.
- Chill the cake before serving.