
When I first tackled the art of truffle making, I never imagined that a simple mix of cocoa and cream cheese could transform into something so decadent. These Red Velvet Truffles are the delightful result of that culinary adventure—a perfect balance of rich chocolate and creamy filling that practically melts in your mouth. The vivid red hue evokes a sense of celebration, making these treats an irresistible addition to any gathering or an indulgent snack for yourself.
As the holiday season approaches, the search for the ideal sweet treat can feel daunting. But these truffles are not only show-stopping; they’re surprisingly easy to whip up, requiring just a handful of classic ingredients. Whether you’re planning a party, looking for a thoughtful homemade gift, or simply craving a special dessert, these Red Velvet Truffles are sure to impress. Join me in creating this sweet masterpiece that’s both a feast for the eyes and a joy to the palate!

Why are Red Velvet Truffles a Must-Try?
Indulgence at its Finest: These rich Red Velvet Truffles combine velvety chocolate and creamy filling for a treat that’s utterly irresistible.
Celebratory Appeal: Their striking color makes them the perfect centerpiece for any festive occasion or gathering.
Simplicity in Preparation: With just a few classic ingredients, this recipe is both easy and quick, making it ideal for bakers of all levels.
Versatile Flavor Profile: Whether served on their own or paired with coffee, these truffles can be enjoyed whenever the mood strikes.
Perfect Gift Idea: Homemade gifts come straight from the heart, and these truffles are sure to delight anyone who receives them!
Red Velvet Truffles Ingredients
• Here’s what you’ll need for these delightful Red Velvet Truffles!
For the Truffle Base
- All-Purpose Flour – Provides structure for the truffles; substitute with gluten-free flour for a gluten-free version.
- Unsweetened Cocoa Powder – Adds rich chocolate flavor; try Dutch-processed for a deeper taste.
- Granulated Sugar – Sweetens the truffle mixture; can be replaced with coconut sugar for a lower glycemic index.
- Baking Soda – Acts as a leavening agent; essential for achieving the right texture—don’t skip it!
- Salt – Balances the flavors; use sea salt for a gourmet touch.
- Butter – Adds moisture and richness; opt for unsalted or replace with margarine for a dairy-free alternative.
- Large Egg – Binds the ingredients together; can be omitted for a vegan version using flaxseed meal as a binder.
- Red Food Coloring – Gives the truffles their signature color; consider natural options like beet juice.
- Vanilla Extract – Enhances flavor depth; homemade vanilla makes it even better!
For the Creamy Filling
- Cream Cheese – Creates a luscious, creamy filling; substitute with vegan cream cheese for a plant-based option.
- Powdered Sugar – Sweetens the cream cheese filling; try alternative powdered sweeteners for a sugar-free option.
For the Coating
- Semi-Sweet Chocolate Chips – Coats the truffles for that rich chocolatey exterior; dark chocolate can be used for a richer taste.
- Sprinkles/Chopped Nuts – Optional for decorating; choose according to dietary needs (omit for nut-free).
How to Make Red Velvet Truffles
-
Prepare Batter: Start by creaming together the softened butter and granulated sugar until it’s fluffy and light in color. This should take about 2-3 minutes.
-
Mix Dry Ingredients: In a separate bowl, whisk together the all-purpose flour, unsweetened cocoa powder, baking soda, and salt. This will ensure even distribution of the leavening agents.
-
Combine Ingredients: Gradually add the dry mixture to the creamed butter and sugar, mixing until just blended and no dry spots remain.
-
Add Egg and Flavors: Beat in the large egg, red food coloring, and vanilla extract until the mixture is smooth and the color is vibrant.
-
Bake Cake: Spread the batter evenly in a greased 9-inch round cake pan. Bake at 350°F (175°C) for 20-25 minutes, or until a toothpick inserted comes out clean.
-
Cool Cake: Allow the cake to cool completely in the pan before transferring it to a wire rack to cool fully. This is key for crumbling.
-
Prepare Filling: In a mixing bowl, beat the cream cheese until smooth. Gradually incorporate the powdered sugar until well combined and creamy.
-
Combine Cake and Filling: Crumble the cooled red velvet cake into the cream cheese filling and mix until fully incorporated. This will make for a deliciously rich truffle center.
-
Shape Truffles: Roll the mixture into 1-inch balls and place them on a parchment-lined baking sheet. Get the family involved—it’s fun!
-
Chill: Refrigerate the truffles for at least one hour to firm up their shape before coating.
-
Melt Chocolate: Melt the semi-sweet chocolate chips in the microwave, stirring every 30 seconds until smooth and glossy.
-
Coat Truffles: Dip each chilled truffle in the melted chocolate, allowing excess to drip off before placing them back on the baking sheet.
-
Decorate: Before the chocolate sets, sprinkle your chosen toppings, such as sprinkles or chopped nuts, for added flair.
-
Chill Again: Refrigerate the coated truffles for an additional 30 minutes to let the chocolate set completely.
Optional: Drizzle with white chocolate for an extra touch of sweetness and elegance!
Exact quantities are listed in the recipe card below.

Storage Tips for Red Velvet Truffles
Room Temperature: Keep truffles in a cool, dry place for up to 3 days. Just ensure they’re in an airtight container to maintain freshness.
Fridge: Store in an airtight container in the refrigerator for up to 1 week. This helps retain their creamy filling texture and prevents drying out.
Freezer: You can freeze Red Velvet Truffles for up to 2 months. Arrange them in a single layer on a baking sheet until firm, then transfer to a freezer-safe container.
Reheating: To enjoy, thaw in the fridge for a few hours or overnight. Avoid using a microwave, as that can alter their texture.
Make Ahead Options
These Red Velvet Truffles are a fantastic choice for meal prepping! You can prepare the truffle base, shape them into balls, and refrigerate them for up to 24 hours before coating. To do this, follow the initial steps until just after rolling the mixture into 1-inch balls, then place them on a parchment-lined baking sheet and refrigerate. For the best quality, cover them tightly to prevent drying out. When you’re ready to serve, simply melt the chocolate, coat the chilled truffles, add your desired toppings, and refrigerate again for at least 30 minutes until set. This method ensures you save precious time on busy days while enjoying delicious homemade treats!
What to Serve with Red Velvet Truffles?
These indulgent bites are perfect for adding a touch of sweetness to any gathering or cozy evening at home.
-
Rich Hot Chocolate: A warm, creamy cup of hot chocolate enhances the dessert experience, intensifying the cocoa flavor with each delightful sip.
-
Coffee or Espresso: The deep, rich taste of coffee beautifully balances the sweetness of the truffles, making for a sophisticated pairing that’s perfect for after dinner.
-
Creamy Cheesecake: Offering a contrasting texture, a slice of smooth cheesecake brings a different yet complimentary creaminess that pairs wonderfully with the truffles.
-
Fresh Berries: Vibrant berries like raspberries or strawberries add a burst of freshness and tartness, balancing the sweetness of the Red Velvet Truffles beautifully.
-
Classic Vanilla Ice Cream: Serving the truffles alongside a scoop of vanilla ice cream creates a delightful temperature contrast and a creamy contrast to the fudgy truffles.
-
Sparkling Wine: A light, bubbly sparkling wine elevates the evening’s indulgence, making every bite of your truffles feel more festive and special.
-
Decadent Chocolate Cake: For the ultimate chocolate experience, serving these truffles with a slice of rich chocolate cake creates a dessert lover’s dream scenario.
-
Nutty Granola: For a fun twist, offer a side of nutty granola, introducing a crunchy element that enhances both texture and flavor in each mouthful.
Red Velvet Truffles Variations
Looking to add a personal twist to your delightful Red Velvet Truffles? Here are some scrumptious ideas to inspire your creativity!
-
Almond Extract: Swap almond extract for vanilla for a nutty flavor that surprises and delights.
-
Nutty Crunch: Add chopped walnuts or pecans into the truffle mixture for an unexpected crunch that elevates each bite. It provides a wonderful texture contrast!
-
White Chocolate Coating: Use white chocolate instead of semi-sweet to create a sweeter, creamier coating that beautifully complements the richness inside.
-
Coconut Flakes: Roll your chilled truffles in shredded coconut for a tropical flair that adds both flavor and a lovely visual appeal.
-
Spicy Kick: Incorporate a dash of cayenne pepper or chili powder into the chocolate coating for a surprising heat that balances the sweetness.
-
Fruit Infusion: Fold in dried cranberries or cherries into the truffle mix for a burst of fruitiness that brightens the overall flavor profile.
-
Minty Freshness: Mix in a few drops of peppermint extract for a refreshing twist, perfect for holiday gatherings.
-
Cake Pops: Transform your truffles into cake pops by inserting sticks before dipping in chocolate, ideal for festive celebrations and easy sharing!
Expert Tips for Red Velvet Truffles
- Use Room Temperature Butter: Make sure your butter is softened to room temperature for easy creaming; cold butter will lead to lumps in your mixture.
- Don’t Skip Chilling: Allowing the truffles to chill before coating helps maintain their shape. This is crucial for perfect Red Velvet Truffles!
- Melt Chocolate Carefully: When melting chocolate, do it in 30-second intervals to avoid burning. Stir well between intervals for a smooth finish.
- Even Coating: Use a fork to dip and remove the truffles from the chocolate, ensuring a thin, even coating and preventing chocolate pooling.
- Experiment with Decorations: Try different toppings, like crushed nuts or nonpareils, to reflect your personal style and cater to various palates.

Red Velvet Truffles Recipe FAQs
What’s the best way to select ripe ingredients?
Absolutely! For the best results, ensure your cream cheese is fresh and at room temperature before use, which enhances its creaminess in the filling. When selecting eggs, look for large, fresh ones with no cracks on the shell for optimal binding in your mixture.
How should I store the Red Velvet Truffles?
Very! Store the truffles in an airtight container in the refrigerator for up to one week to maintain freshness. You can also keep them at room temperature for up to 3 days in a cool, dry place, ensuring they are still in an airtight container.
Can I freeze Red Velvet Truffles?
Of course! To freeze, arrange the truffles in a single layer on a baking sheet for about an hour until firm. After that, transfer them to a freezer-safe container and enjoy them within 2 months. To defrost, place in the fridge overnight, and they’ll be ready to indulge!
What do I do if my truffles are too soft or sticky?
No worries! If your truffle mixture is too soft, try adding a bit more crumbled red velvet cake or chilling the mixture longer before rolling. If they are too sticky while shaping, lightly dust your hands with powdered sugar to make the process smoother.
Are Red Velvet Truffles suitable for people with dietary restrictions?
Yes, indeed! You can make these truffles vegan by using flaxseed meal as a binder instead of eggs and opting for plant-based cream cheese and chocolate. For gluten-free versions, simply substitute all-purpose flour with gluten-free flour blends. Just ensure to check for potential allergens with other ingredients, especially when preparing for guests.
Can I use alternative toppings for my truffles?
The more the merrier! Feel free to get creative with toppings—consider shredded coconut, crushed graham crackers, or colorful sprinkles! Always adapt to your audience’s preferences or dietary needs, like opting for nut-free decorations if needed.
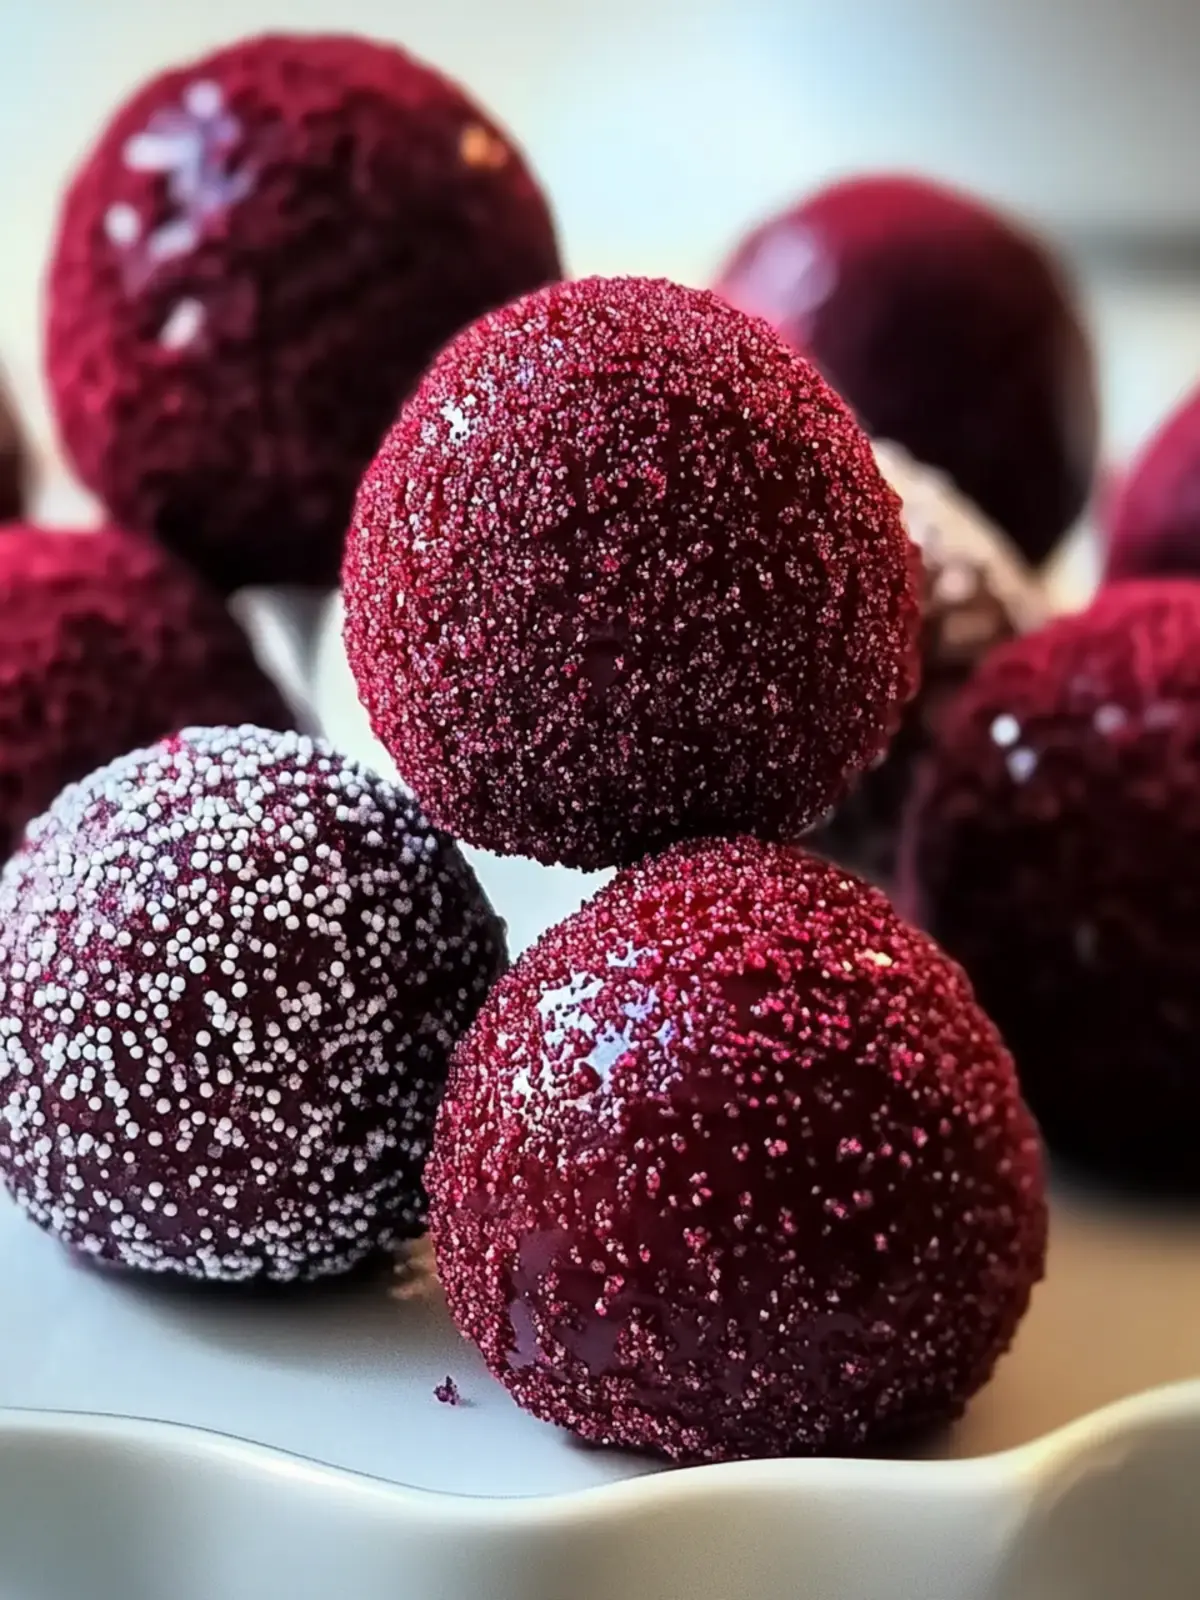
Irresistible Red Velvet Truffles: Sweet Bites of Joy
Ingredients
Equipment
Method
- Start by creaming together the softened butter and granulated sugar until it’s fluffy and light in color. This should take about 2-3 minutes.
- In a separate bowl, whisk together the all-purpose flour, unsweetened cocoa powder, baking soda, and salt.
- Gradually add the dry mixture to the creamed butter and sugar, mixing until just blended and no dry spots remain.
- Beat in the large egg, red food coloring, and vanilla extract until the mixture is smooth and vibrant.
- Spread the batter evenly in a greased 9-inch round cake pan. Bake at 350°F (175°C) for 20-25 minutes.
- Allow the cake to cool completely in the pan before transferring it to a wire rack.
- In a mixing bowl, beat the cream cheese until smooth. Gradually incorporate the powdered sugar until well combined.
- Crumble the cooled red velvet cake into the cream cheese filling and mix until fully incorporated.
- Roll the mixture into 1-inch balls and place them on a parchment-lined baking sheet.
- Refrigerate the truffles for at least one hour to firm up their shape before coating.
- Melt the semi-sweet chocolate chips in the microwave, stirring every 30 seconds until smooth.
- Dip each chilled truffle in the melted chocolate, allowing excess to drip off.
- Before the chocolate sets, sprinkle optional toppings like sprinkles or chopped nuts.
- Refrigerate the coated truffles for an additional 30 minutes to let the chocolate set completely.